Oct 27, 2011

Mummy's old dress into little girls dress

One of the things I love doing is searching for tutorials online, looking at what other people are doing and how they are doing it.  I'm always picking up tips here and there, and even if I don't follow the tutorial exactly, they are always great for inspiration.

I've decided to do my own tute to "give something back" so I don't feel like such a scavenger pinching everybody else's great ideas!  Hopefully it will be useful to somebody!  And if anybody does decide to use my tutorial for their own projects, I'd love to see the finished product.

Mummy's old dress into little girl's dress


What you will need:

1 x dress you no longer wear 
I had a tiered dress but this would work well with any dress.  I have a dress with a busted zip down the side I am thinking of using as well - I will just have to cut out the zip and put in a side seam instead.  
Elastic - I used 3/4 inch
Coordinating thread
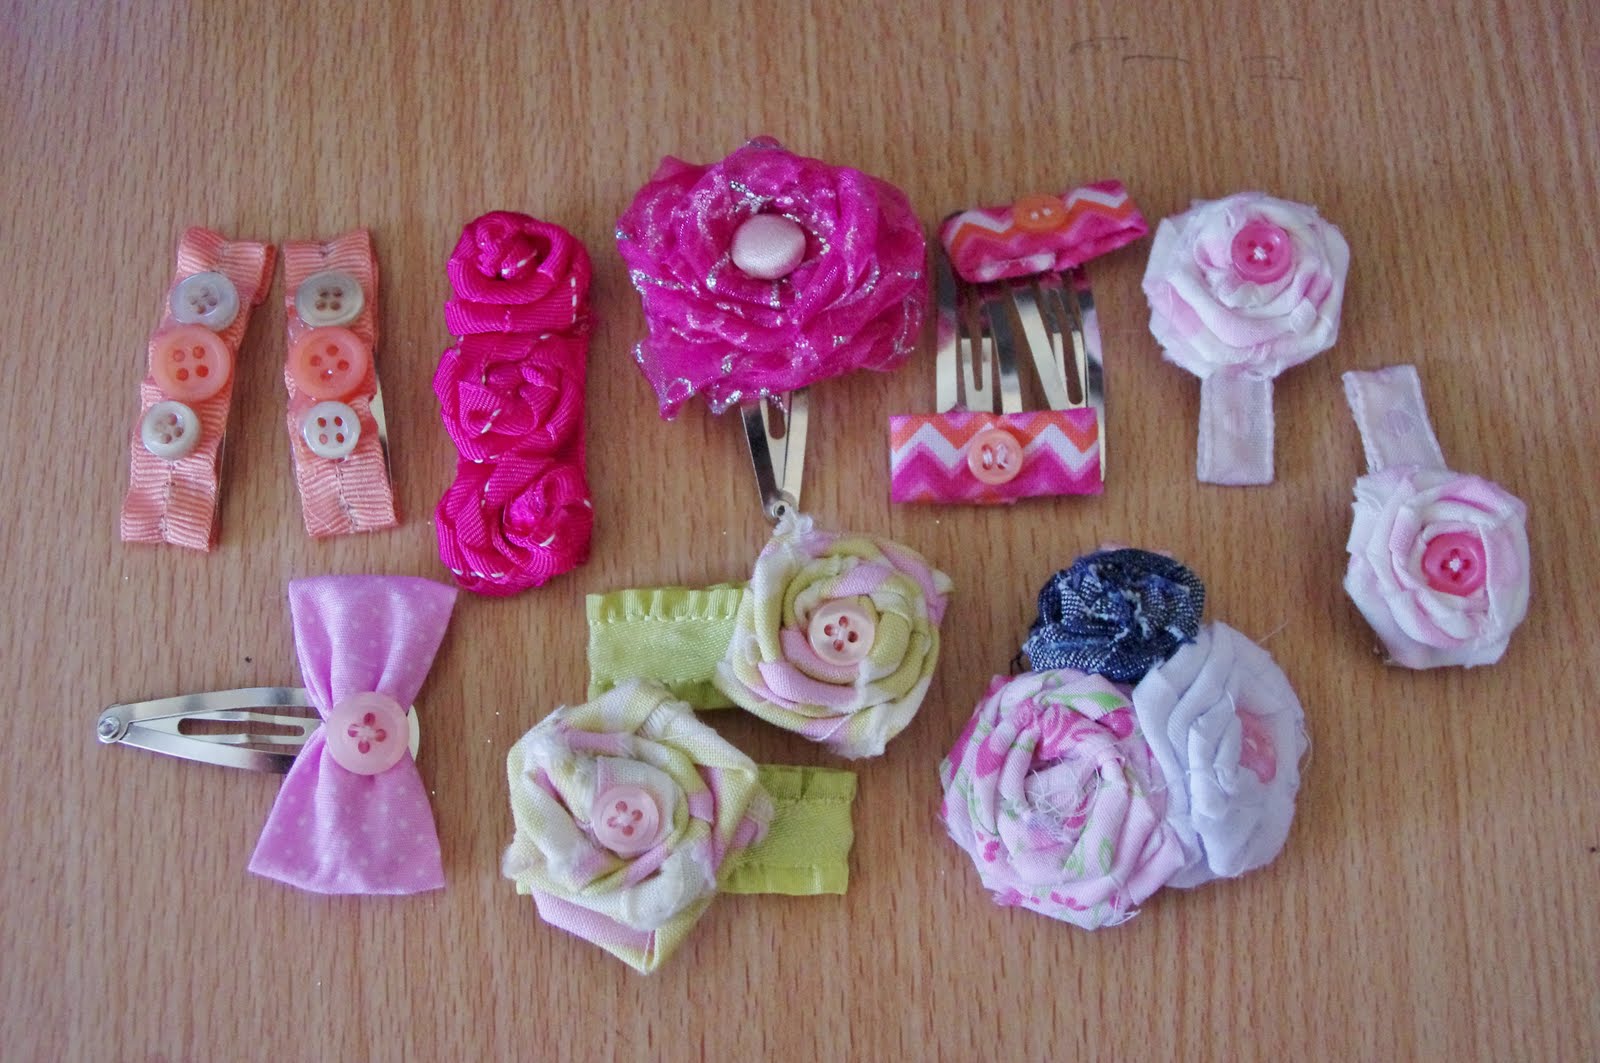
Ribbons, buttons, fabric scraps for decoration

How-to:

First of all, I cut the dress.  This dress was lined but I only cut the top layer.  I might use the lining for something else later.  To work out how long you want your finished dress, measure your child or take a measurement off a dress you already know fits your child well.  To this measurement, add an inch for the hem, and about an inch and a half for the top casing.  This dress had a shirred waistband, so I cut it right under the waist, and again about half way down the final tier.  I've marked the cut lines in white here (obviously cut the bottom straight across, I just have a curved line here because the dress is all spread out):


From the portion at the bottom of the dress, I cut two strap pieces and two sleeve pieces, like this:


Don't worry too much about the shape of your sleeves, as long as one has a gently curved edge, and one has more of a pronounced curve, you should be right.  You'll gather it so in the end you don't really notice the shape of it.


Now you will need to sew a casing around the top of your dress. Fold the top of the dress down, to the inside, half an inch, then 1 inch. Iron in place. Then stitch from the outside right on the very edge of your casing, almost all the way around (remember you need to leave a gap to thread your elastic through).


Then put another line of stitching about 1/8 inch down from the top of the dress. This will help to keep your elastic from twisting in the casing, and also makes a nicer gather around the neckline of the dress.


Measure your child's chest - under the armpits is best as this is where the dress will sit.  Add an inch to this measurement and cut your elastic.  Now you can thread your elastic through the casing like this:


Overlap the ends of the elastic and secure with a zigzag stitch.

Now we need to make the straps. Take your two strap pieces. Iron them in half, long ways, so that the long edges meet in the middle. Then fold in half again, and iron flat. Like this:


Take your sleeve pieces. Hem the edge with a slight curve. I overlocked mine, and then turned this overlocked edge just under and did a very narrow hem. If you don't have an overlocker you can just turn it under, and under again. You could do a rolled hem if you like, but I don't know how to do one of these so I just went with what I knew!


Then, sew a gathering stitch around the other (more pronounced) curved side of your sleeve. Use a nice long stitch here - I use a stitch length of 4 as this is all my machine goes up to.


When you're done, pull on the threads of your gathering stitch until the sleeve is about half the length that it was to start with. Do the same with your second sleeve.

You now need to attach your sleeves to the straps.  Open up the strap as in the picture below, and pin the sleeve to one edge, so that when the sleeve is sewn shut, the sleeve is sandwiched inside.  Hide your gathering stitch so that it lines up approximately with where you will sew your seam.


Close up your strap and add more pins if you like.


Sew down the edge of the strap with a narrow seam (mine was about 1/8 inch), making you sure you catch all three layers together.


Sew down the other side of the strap in the same way.


Now you have finished your sleeve! Do the other one!


Once you have your two sleeves completed, figure out where you want to attach them to the dress. I convinced my model to try on her dress so I could pin the straps where I wanted them first, but this isn't always successful (particularly if she is in a difficult mood!). As the top is elasticated, you've got a bit of lee-way, so the positioning doesn't have to be perfect. Once you've determined where you want to put them, pin them in place on the inside of the dress, and then from the outside, stitch them along the two lines of stitching you've already got (the ones on the top and bottom of the elastic casing.  Try not to stitch through the elastic.  This is where mine sit at the back:


And the front:


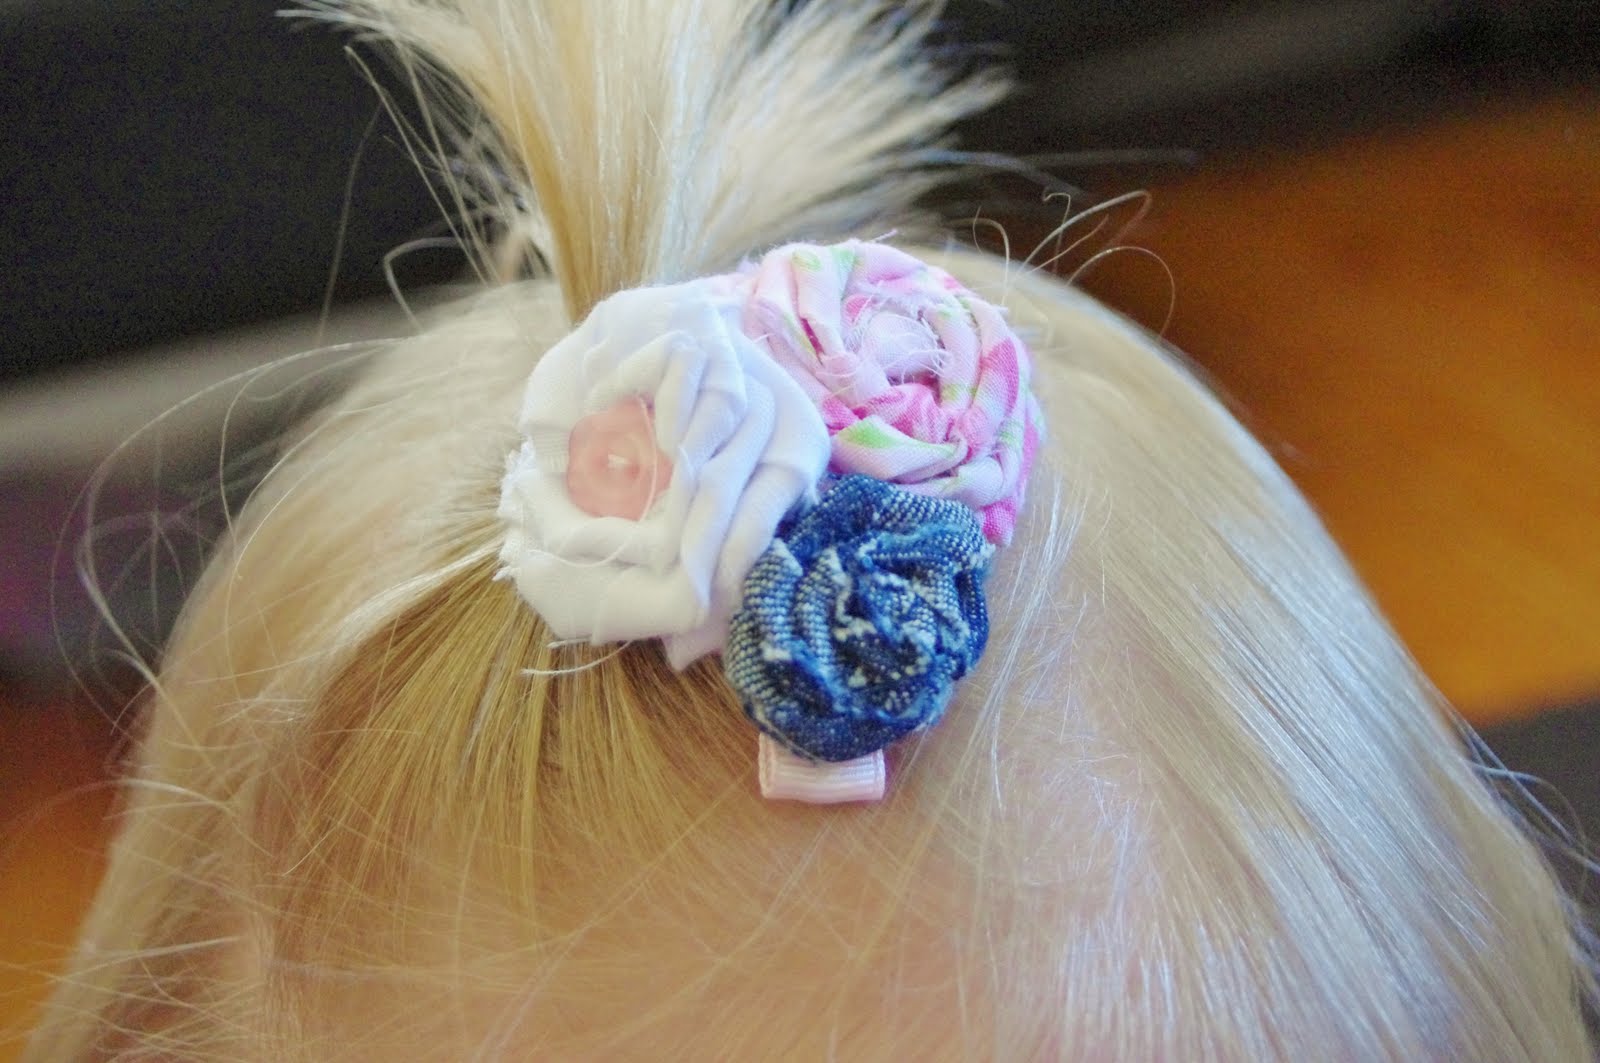
I also decided to make a couple of little rosettes out of some scraps and navy blue ribbon that I had.  I used this tute for the rosettes, but there are heaps of them online.  You could do anything for the embellishment though, or leave it off completely, it's up to you.

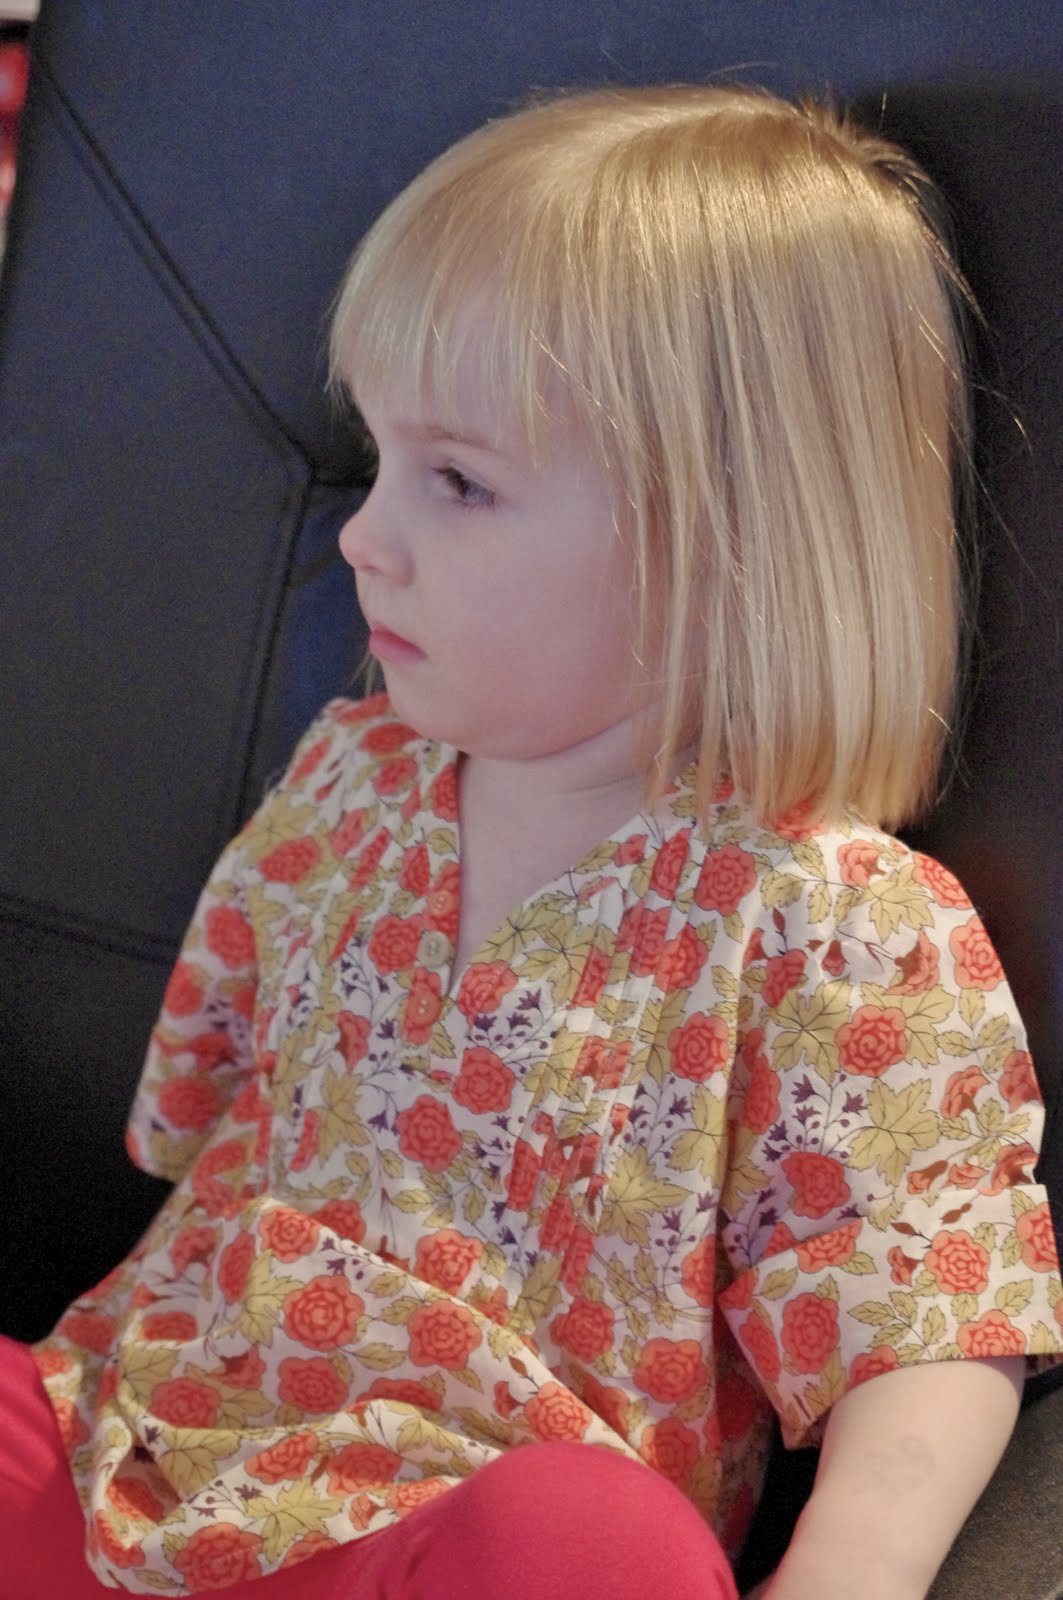
Now just hem the dress and you're done!


Time to play!


I could make that

I've been pretty busy lately, madly sewing for Summer as the weather warms up.  I've finished off a few dresses now, but so far only been able to get photos of this one.  It's another dress inspired by a Pumpkin Patch one I saw.  More and more I find myself thinking "I could make that" when I'm out shopping for the girls.
The dress I saw in the store

For this one, I had to teach myself how to make and insert piping.  Also, how to sew in an invisible zip - properly! I think I did alright on both counts. Not perfect, but I was happy with my efforts for a first attempt.


The pattern I used was Simplicity 2270 - the sleeveless version, and I left out the pockets.  I found some cute printed poplin at Lincraft that I was originally going to make a little white Summer shirt with, but decided to use it for this dress instead.


It's lined as the fabric was pretty thin and a bit see-through foe a dress, I thought. I just hope that doesn't make it too hot to wear in Summer. I Made a little rosette for the neckline from a scrap I had left over from a re-purposing project. Got to blog that one yet!


Lots of blue and white in this season's wardrobe. She's slowly coming around, but pink is still the all time favourite.

Thank goodness for television... it's the only thing that can get her to stand still!

Oct 19, 2011

Refashion: Overalls into pinafore (and skirt)

I've been sewing lately, just not blogging.

I had to get a couple of Christmas presents out of the way - dresses for my nieces, which I'm not going to post as I want them to be a surprise.

I've also been busy making lots of little hair clips for the girls. I can't believe I haven't made any of these sooner - they are so easy and come up simply gorgeous with very little effort. I love that I can literally make them out of scraps and that I can make little co-ordinating clips for each of their outfits. I don't think I'll ever buy hair clips again.  Here's what I've made so far:


For a quick Sunday afternoon project I decided to make this little nautical themed skirt out of some white cotton batiste and navy blue jumbo ric rac. It's self lined and has a simple elastic casing at the waist. I finished it off with some blue and white buttons. It's for Katherine, but I don't think she has a top to wear with it so that's going to be a project for the future now!


I've been wanting to turn a little pair of overalls into a dress for a while now.  My sister actually bought these for one of her daughters, and had a similar fate in mind for them but never got around to it.  She gave them to me a while ago and last weekend I finally got around to working on them.

They were really cute and I would have kept them as overalls except for the fact that the press-studs up the inside of the legs never stuck!  They would come apart and I was forever trying to press them back together so that Ellie wasn't getting tangled up in the legs and tripping over them. So I cut off the legs and stitched a little gathered skirt around the bottom of it instead.


Advanced reader - skips the children's shelf and goes straight for the war biographies.

Then I decided I really wanted to do something with the leg panels themselves, as they had this really cute embroidery on them.


I thought they would have made a really cute denim skirt but they weren't wide enough to turn into a skirt the way they were so I used a little floral scrap I had and made a centre panel out of that. I had to unpick the original hem on the leg panels, then I stitched the centre panel in place, then hemmed the skirt again and added an elastic casing at the top.


Finally, I made a little custom hair clip to match both the skirt and the pinnie, out of some scraps I had left over.


The End

Sep 27, 2011

Baby, you're tops!

I just wanted to share my latest knock-off, I love this one.

This is a singlet top from Pumpkin Patch (ok, they're not the only children's clothing store on the planet, but I can't get enough of their stuff!). As soon as I saw it, I thought of some scraps I had lying around from this dress I made last Christmas for my niece. She's the one at the front on the left.


I didn't have a pattern, but I thought it looked simple enough to tackle without one.  I cut a front and back piece, making them much wider than what I needed so I could gather the top in with pleats.  I also made up a bunch of bias strips for the edges and straps.  I knew I wanted about half a dozen pleats, but I didn't care about the size of them - I figured I would just pinch them in until the bodice was the width I needed.  I wasn't sure what to do about the back - I knew it wouldn't fit over Katherine's head the way it was, and I briefly thought about putting an elastic casing in but in the end I decided to cut it right down the middle and put buttons right down the back.  I sewed it up, attached the bias strips and popped a couple of buttons on the front.  Here it is:


Closer view of the pleats at the front.


And buttons down the back.  I'm not sure if it will be too broad across the back yet - I'll have to try it on Katherine when she gets home - it's day care day today.


While I had the camera out, I thought I may as well take a picture of these pintuck tunics I made recently.  I had never sewn pintucks before and decided to teach myself, with some help from Google!

A blue one.


And one in gorgeous Japanese lawn that I picked up on special from Spotlight.


Bonus - I managed to get shots of them being modelled!


Sep 26, 2011

Knock it off!

Lately, I've been combining two of my favourite things - shopping and sewing. With the weather warming up, I figured I would need to go out and get some summer clothes for the girls (Katherine in particular - my love of shopping has ensured Ellie has a pretty constant stream of hand-me-downs from her big sis).

I found some gorgeous little dresses in Pumpkin Patch, but there was no way I could justify paying that much on a little girls dress. I'd baulk at spending $60 on a dress for myself! So, I had a bit of a think about how I could recreate a couple of them at home.


This military-style shirt dress was super cute. I thought I might be able to get the same sort of look with an Oliver & S Jump Rope Dress in similar colours. I've made a few of these dresses now and I love this pattern.  I made a (generous) size 3 as the 2T I'd previously made was now just that teeny bit too tight on my tiny almost-4-year-old.  It's probably just that little bit too big on her, but she will grow into it.  


I made it out of a lightweight cotton drill and some pretty pink and white floral fabric from Lincraft.  I made a few changes though - I did the inner placket, pocket flaps, and tie in the floral trim. Plus I decided I wanted the front placket to run the length of the dress, so it was more like the Pumpkin Patch dress.  You can see I tried to trim the hem the same way as the original too.


I am still toying with the idea of putting some pockets on the front here.  In fact, I might rip the pockets off the skirt and put military-style pockets on the skirt as well.  I think that's definitely what it needs.  I just haven't decided yet whether it's worth the effort.  I hate unpicking!


My second effort was inspired by this absolutely gorgeous striped dress.  I had to think about this one a bit more as I had never really made anything this shape before.  I couldn't believe it when I stumbled across the perfect pattern in one of my Ottobre mags!

Ok, maybe it's more accurate to say I knew it would be perfect after I had made a few adjustments!  I rounded off the neckline and then put in that little 'v' to make an almost sweetheart neckline.  I left the sleeves off completely, and made the shoulder straps just that little bit narrower.  I added belt loops.  And I cut a strip of fabric in the opposite direction for the trim along the hem.  Oh, and the original dress had a zip down the back - I decided on buttons because I hate zips!  I still haven't figured out how to use my zipper foot properly, and I couldn't have been bothered learning it now.


I was so happy with the finished dress!  I made it in blue as black and white just doesn't seem to suit my fair-haired little cherub.  But I did buy some black and white striped fabric to recreate this dress for a special niece of mine for Christmas!  Shhh...


The belt came off a pair of summer shorts I bought from Target a little while back.  I had it in mind for this dress as soon as I saw the one in the shop.


The buttons down the back are white with little stars.  I thought they fit well with the whole nautical theme.

So what do you think?  I'm not done yet.... I've still got a couple of ideas up my sleeve.  Two more dresses, and then I will take a break!

Sep 18, 2011

Spring in my step

I can't believe it's been so long since I've blogged anything!  Whoops!

After a couple of false starts, the warmer weather is definitely upon us, so I've been inspired to get a few Spring and Summer projects underway.  I stumbled across this tutorial - I don't even know how I came across it to be honest, I think it was just random blog surfing one day - and decided that I had to make one for Katherine.  I had some stripey knit that I thought I could "practice" with, as I wasn't 100% sure on the measurements I'd need and figured that a knit fabric would be more forgiving.  Also, the colour of this fabric was so incredibly bright that  I knew I needed to transform it into something fun and Summery in order to do it justice.

I decided to do the top part differently and put a frilly gathered bit on instead of the little pleated panel.  Partly because I thought it would be simpler, and I am inherently lazy, and partly because I had seen them in the stores this way and liked the look of them.

This is what I came up with...


It is a bit long but I figure by the time Summer rolls around it will be a better fit.

I've also been making up a few simple skirts. I don't have photos of all of them, but this is one of the more recent ones I've done, and it's a bit different to the others. It's some white broderie anglaise fabric with some ribbon and button trim. I can't decide whether to put buttons all around the bottom, or to leave it as is. What do you think?


The skirt really isn't as long as it looks in these photos! I think because there was much running and jumping going on that it had started slipping down and really needed to be pulled up again! I made it just that tiny bit bigger than it had to be, because I guess I figured that Katherine is so tiny that she is sure to be due for a growth spurt soon and probably before Summer! I learned my lesson when making a bunch of clothes for Winter that didn't see her through the season as she grew too quickly.

I've got a couple more projects on the go, but I'm not 100% happy with them yet. I hope to be back again soon with more completed projects though.

Before I go, I'm just going to put up a photo of Elspeth in the dress I made for her birthday. This was back in June (where has that time gone?) but I have only just realised that I never posted a photo of her in the dress. Plus I don't want her to think this blog is all about Katherine!